It’s not rare in a family that two children share one room, so not everybody has an own room. Commonly it is not a problem until they are 4-5 years old, even if they have different sexes. But after an age the children desire an own snug, in the case of a boy-girl couple it is more urgent to solve the separation.
If the size of the room is big enough, the separation can be solved easily with placing some wardrobes in the middle of it. Half of them with doors facing to one side, the others facing to the other side. This way both children will have enough storage space. The back of the wardrobes can be wallpapered, even with a unique wall-poster, fit to the style of the kid’s room.
In the case of a smaller room, the room separator could be a curtain, for example. Fix the curtain rod to the ceiling and choose a fabric which has weight to avoid the moving by draught. Panel curtain is perfect for this also.
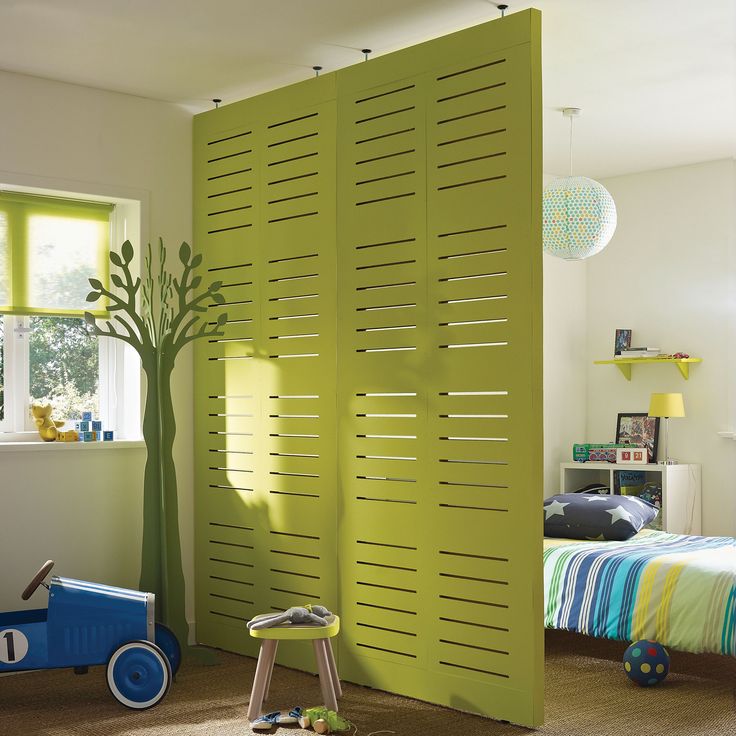
Another solution is a unique partition panel, which is only one-two centimeters thick. Made of cut MDF sheets it lets the light through but separates the space visually. It is fixed to the floor and the ceiling also. The fixing can be a rail-system, this way they are rollable beside each other, with this the two areas can be united again.
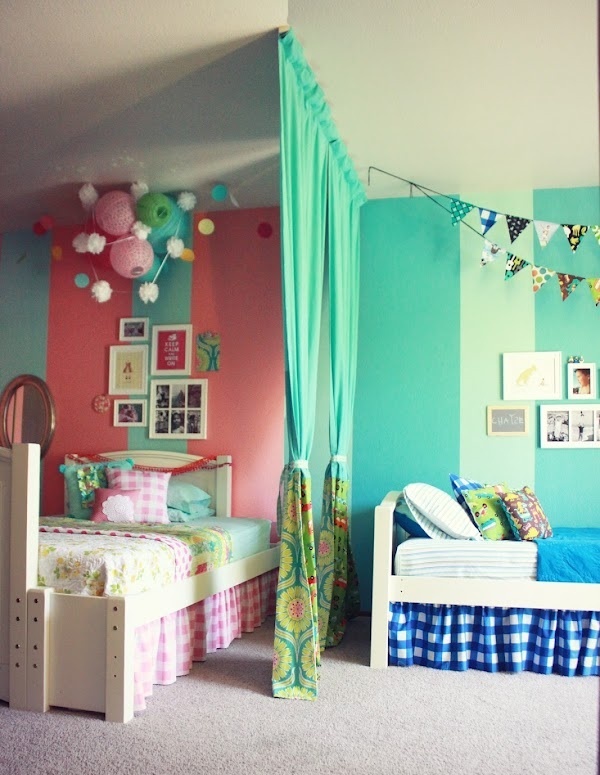
If the room is really very small, let’s paint it with two colors (fifty-fifty) fit for the taste or hobby of the two children and decorate them separately. Although the room remains common, they will feel that part one of their own. If they can compound in a common color instead of the two, it’s much easier.
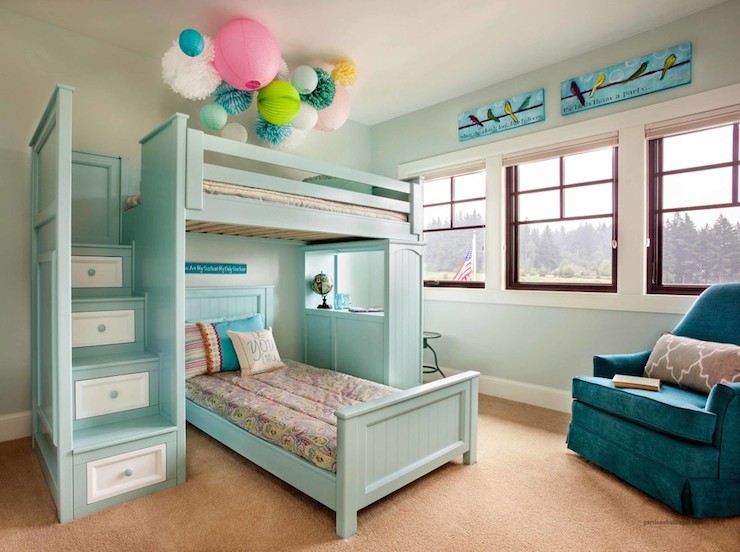
In the case of a high ceiling, the problem can be solved with a loft. If there is enough space for only a bunk-bed, that part can be split into two with painting the wall two-colored horizontally beside the bed. The turned/offset bunk-bed levels provide bigger separation feeling for the children.
Ask for help of an interior designer for planning the kids’ room.
Archives


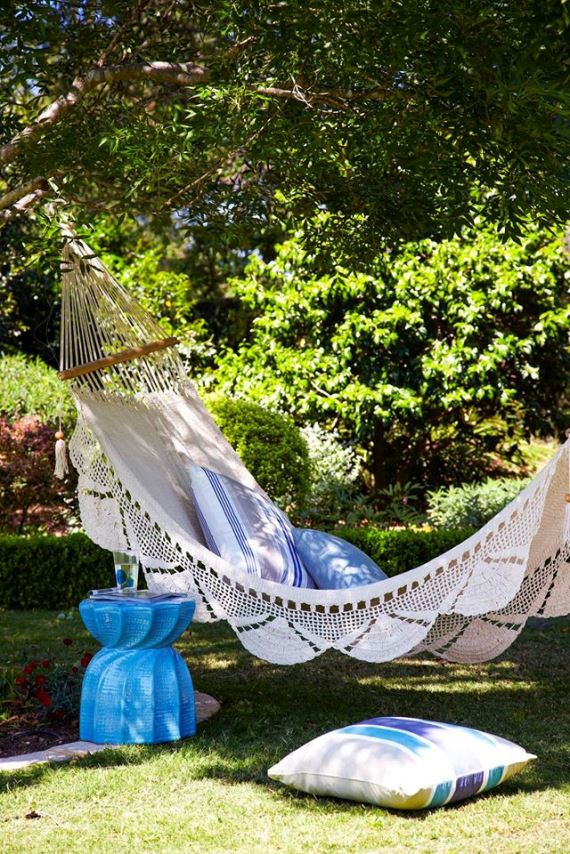
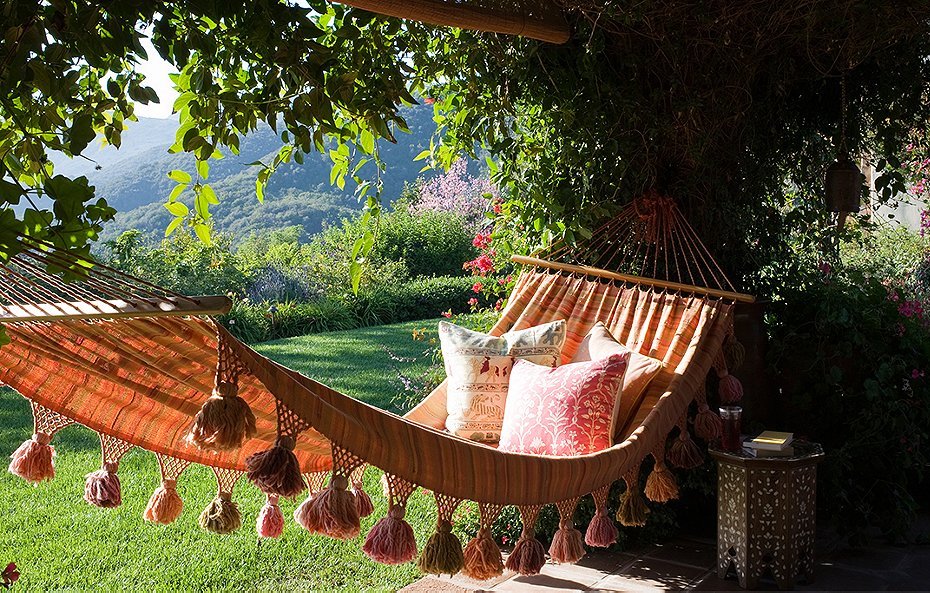
Hammocks
Decorative hammocks for a comfortable afternoon nap

High-gloss furniture
The fashionalble high-gloss (sometimes in bold color) furnitures look good in classic interiors if made in proper style


Misbelieves about interior designers
We almost daily meet opinions about interior designers based on misbelieve. In Hungary, most people still don’t consider this profession to be an honored job. This is why we should clarify the most basic false enunciations.
1. The interior designer wants to implement himself/herself during planning my property
A good interior designer NEVER implements himself/herself during a job, but makes the owner’s dream come true! Because he/she is in the fortunate position that his/her job is his/her hobby as well, he/she doesn’t need more self-justification. It’s a fact that every interior designer has his/her own style after which his/her works are recognizable. This is an advantage for the client, because he/she can choose the designers by their references, which one he/she feels closer the most.
2. Only the rich can afford hiring an interior designer
The price of a whole interior design depends on many parameters, so the offer is always individual. Just like in the case of a tiling or heating job. The starting point can’t be the price of a job done for a neighbor/friend/relative (even many years ago). Asking for an offer is free, we can still take a look among interior designers. Besides, we can ask „only” for an interior design advice which is more cost effective but a much smaller possibility also, but it can help a lot for an amateur.
3. Hiring an interior designer is just a genteel mischief, he/she does indeed nothing for the money
Here are some examples for „nothing”: measuring the property and the requirements, making the plans (building-releasing, lighting, furnishing, custom-made furniture, suspended ceiling, consignation etc.) with discussing it with the client, handling orders, coordinating workers and so on. Say it in a sentence: he/she spares money and time for the client by taking over jobs from the owner as a professional.
4. I exactly know what and how I want, don’t try to force me any other things (color, style, arrangement etc.)
Interior designer forces nothing on anybody. He/she gives advice by the workmanship and experiences. Not only finishing the job is the aim but making the property fit for the expectations of the owner also. He/she can raise many questions which was never thought about by the client or never heard about that possibility. In the case when the owner wants to handle everything from the beginning to the end, but he/she is an amateur, it’s worth to ask for one or two hours of consultation to see if the desired things are really suitable. The owner can spare a lot of money during the renovation with this.
5. The interior designer will suggest me to buy only luxury products which I can’t afford
The interior designer discusses the costs with the owner already at the beginning. He/she will design the future home within the defined budget, fulfilling all the requirements (not unrealistic!) as far as possible. Since he/she knows the market, knows which budget bears what, depending on the features and requirements.
Be confident about interior designers, because they want to make our life better and more comfortable by forming the property according to our needs which we will call home.


Color pairs 26.
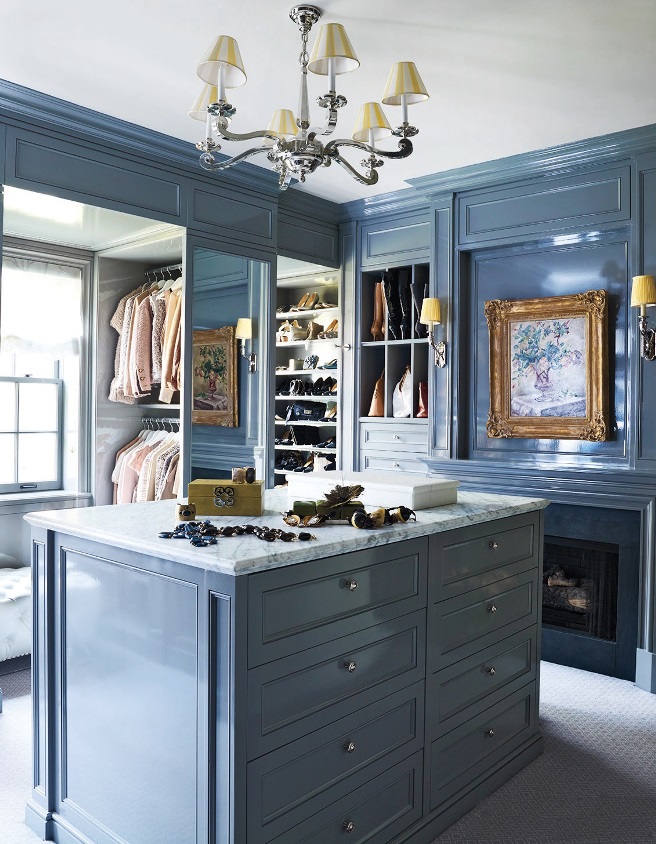
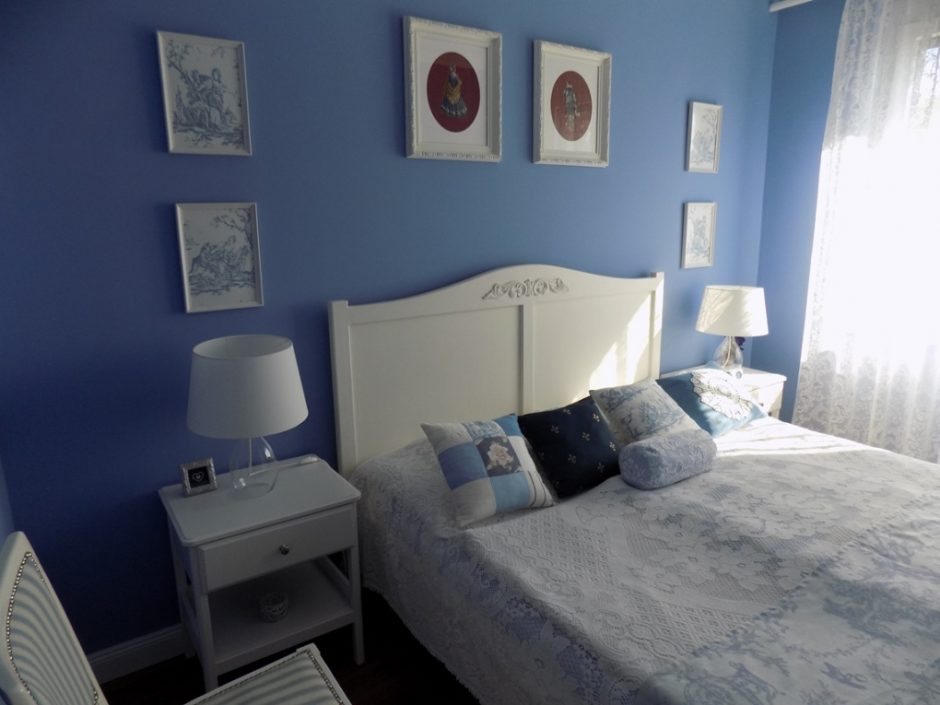
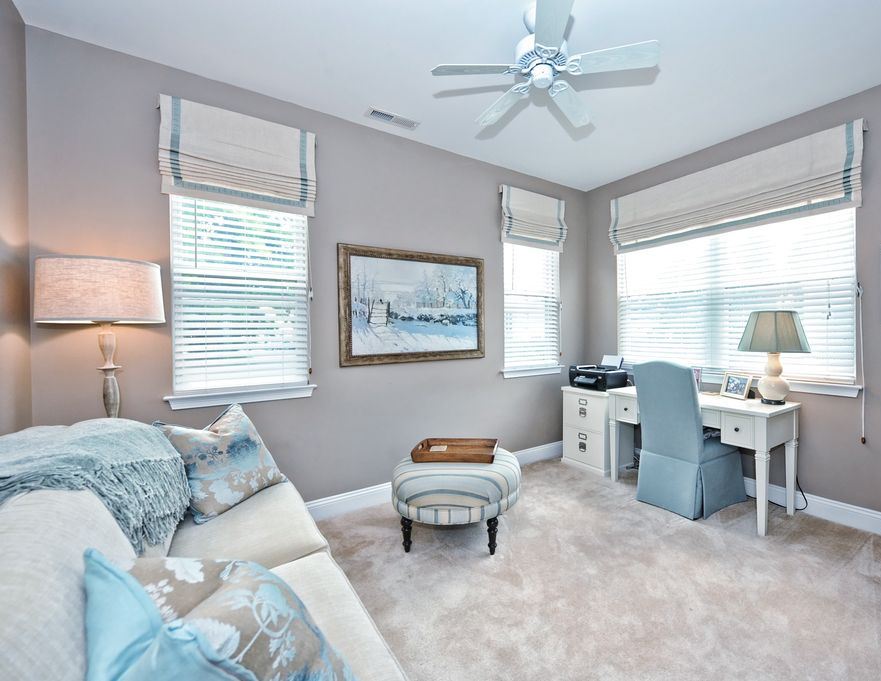
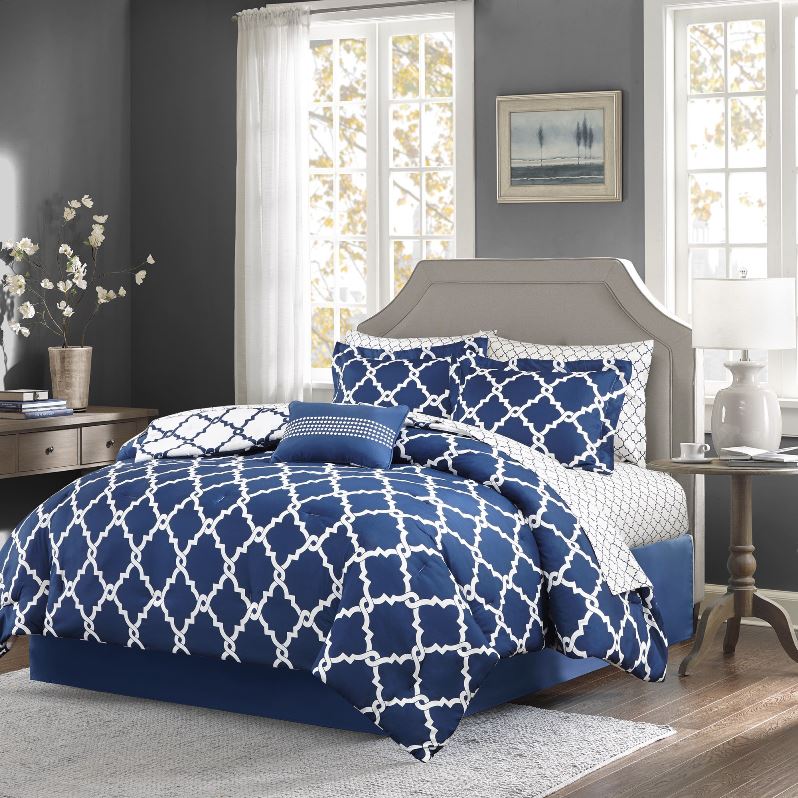
Color pairs: blue-grey

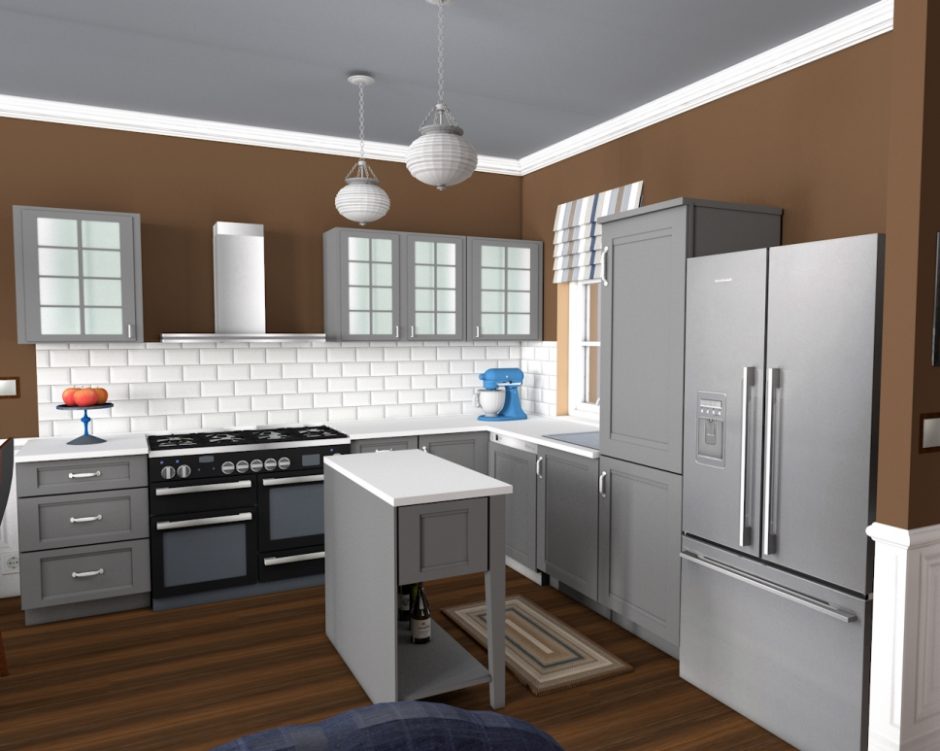
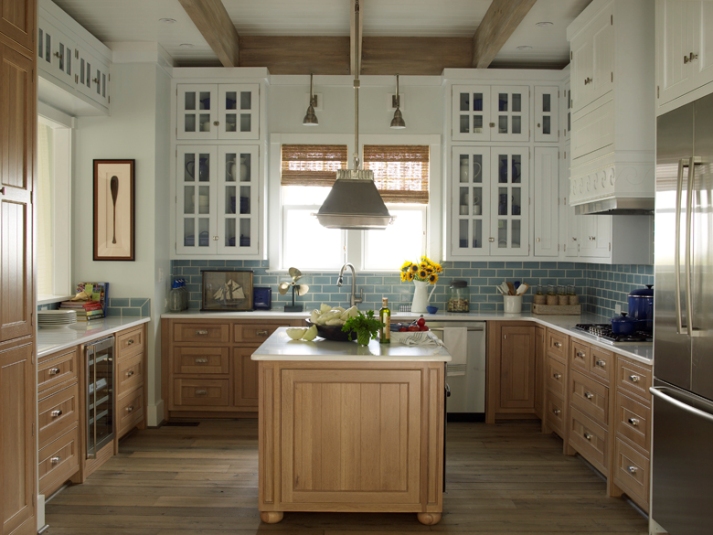
Two-tone kitchen cabinets
Two-tone kitchen cabinets are spectacular and elegant if we keep colors harmonious in the room


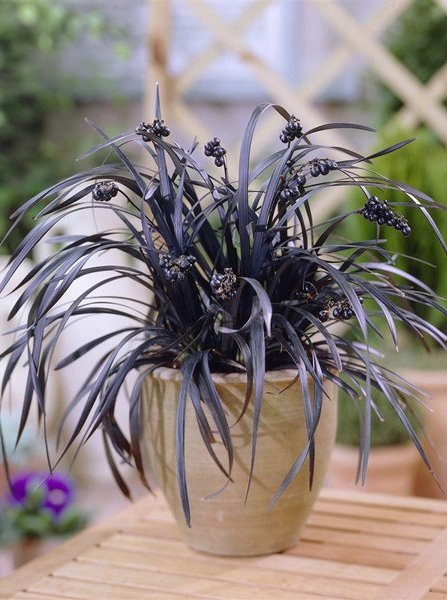
Black flowers
Black color is more and more popular in interior design. Many people bravely paint the walls black or use black wallpaper and buy bigger furniture. If we don’t like to accent this color so much, we can use it on accessories (cushions, vases, candles, picture frames etc.) or on easy changeable smaller pieces of furniture or carpets. Cut or potted flowers always bring nature to the interiors. Where black is the dominant color and the color palette is monochrome, it’s harder to choose plants because bright colors are very different from the concept.
In this case, „black” flowers are perfect, which are less familiar and harder to purchase. Although black is in their name, actually none of them is black, but a very deep hue of claret and purple which seems to be black compared to other plants.
Queen of Night tulip – became famous by the novel of Alexander Dumas – is a plain petal species which looks good in a bigger bunch. There are black ones among so-called parrot tulips, their petals are scalloped.
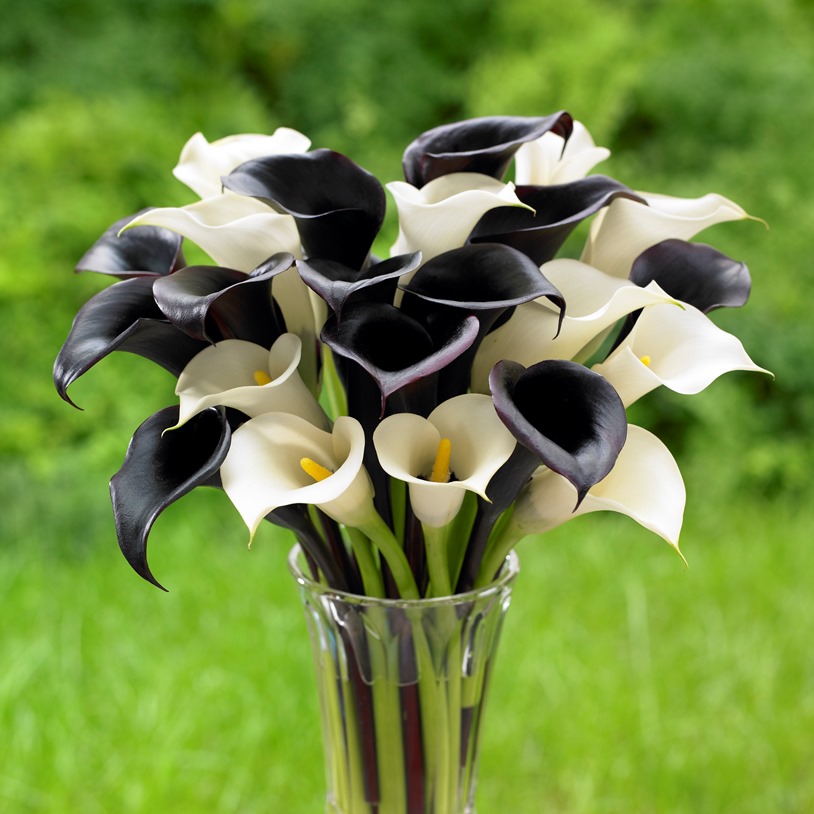
Black calla lily is much more common and can be bought in several flower shops. It is durable, looks good in a big bunch or just one flower itself.
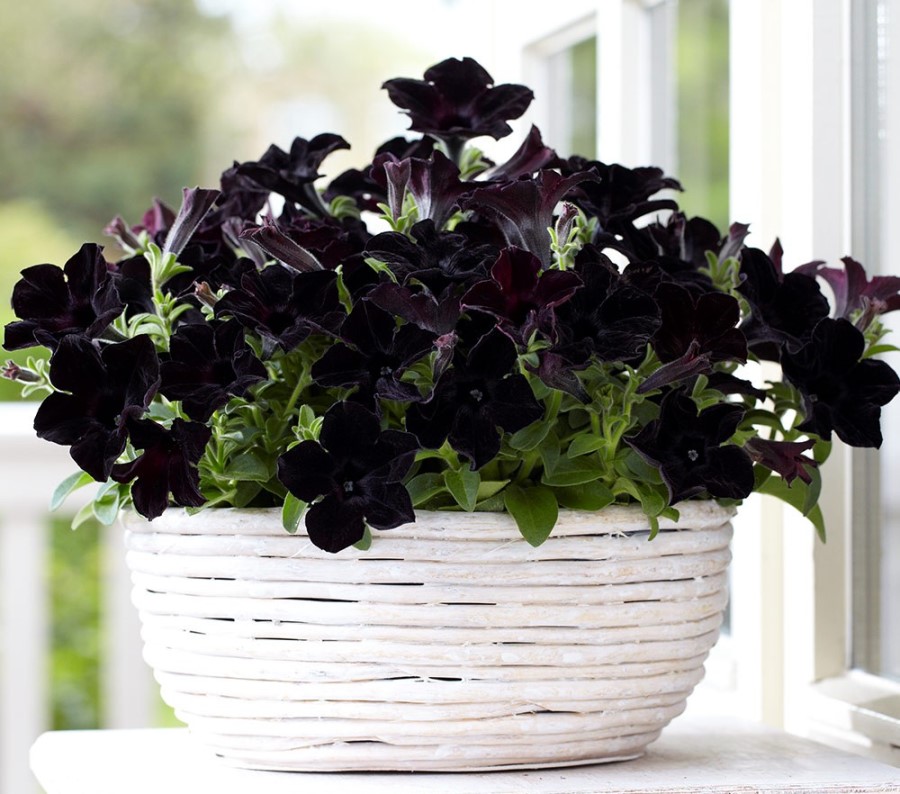
Black Mamba petunia is not a cut flower but it can be perfectly used instead of green plants in black interiors. It blooms richly and long, in addition to, it’s easy to care. Petals are plushy to touch.
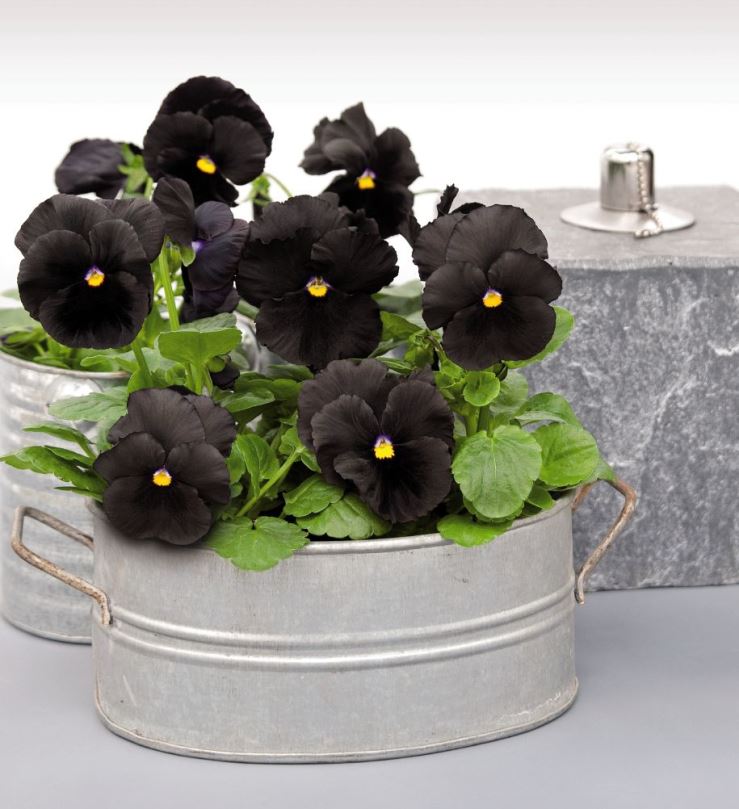
More species of pansies have black flowers (e.g. Atlas, Sorbet Black Delight, Black Beauty). It feels good in balcony pots and hung baskets also. Its blooming time is long. It will be marvelous in pots fitting to the interior.
Black Mondo Grass is a perfect choice for those who want more neutral sight. It has pale pink flowers in summer which turn to bluish black berries later. It can be bred in containers.
There are a lot more species which can be called black (iris, bleeding glory-blower, cornflower etc.). Ask for help of an interior designer for choosing species fitting for your home.

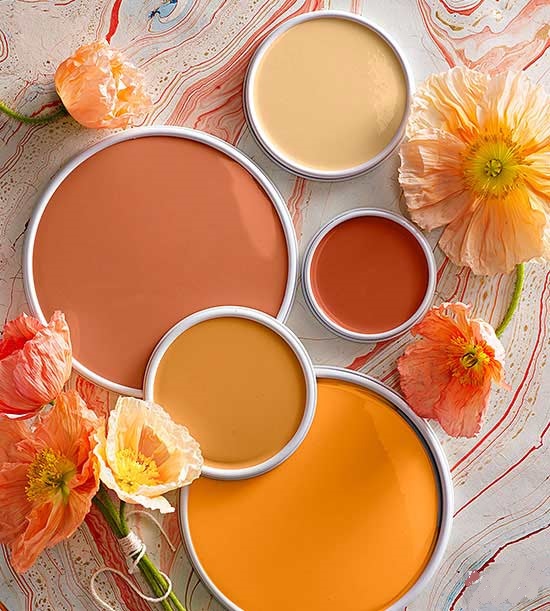
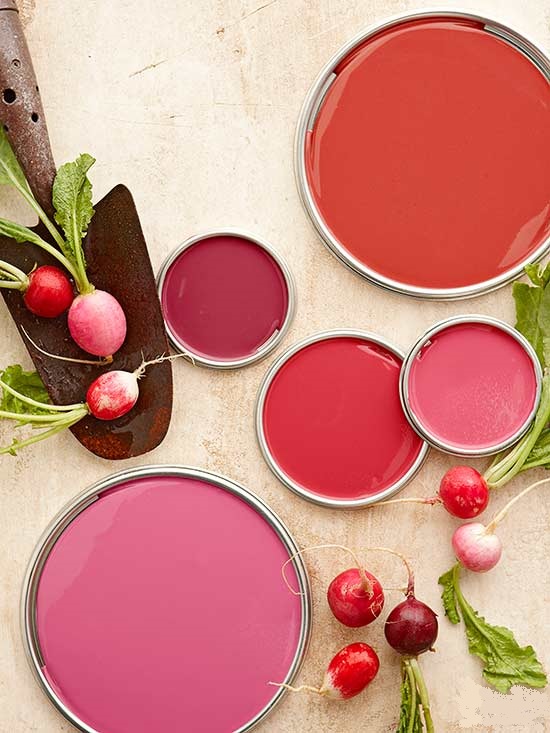
Paint palette 13.
Color palettes from the garden

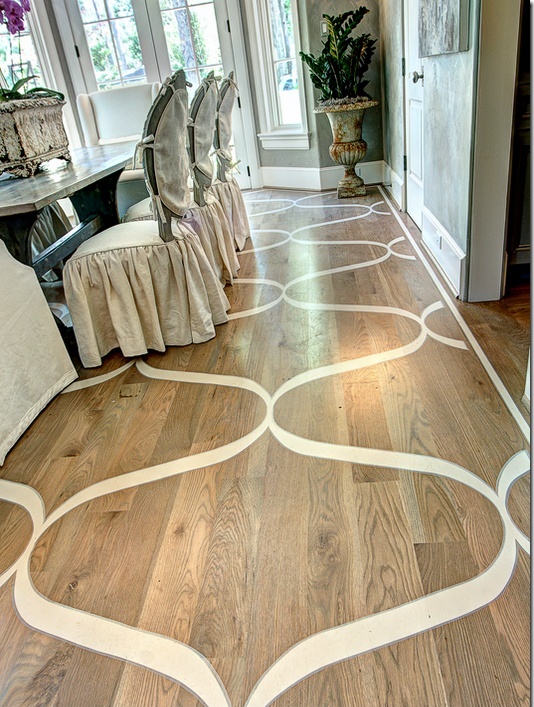
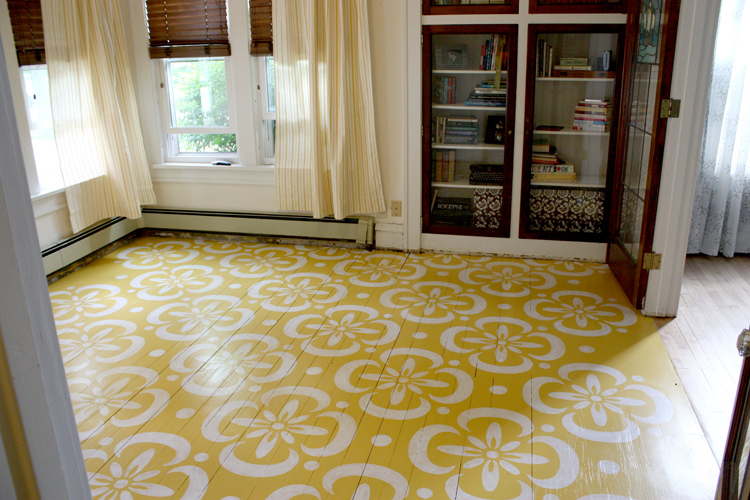
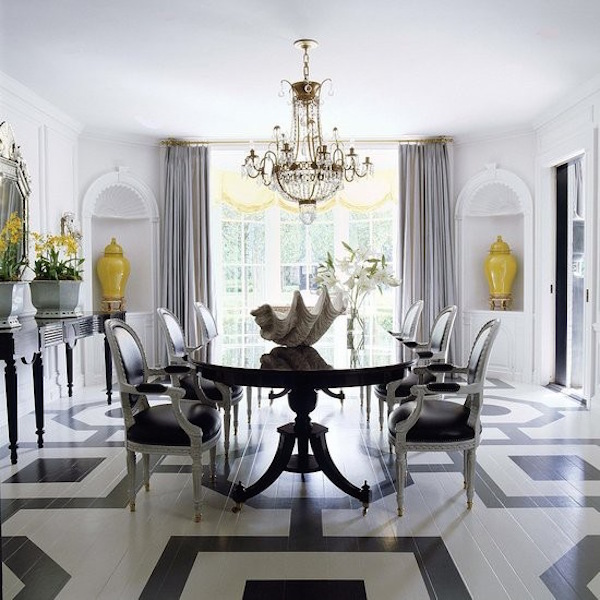
Painted wooden floor
Old wooden floor creativly renewed by painting will be the focal point of the room
Kitchen sockets
There is a growing demand for invisible sockets on the countertop when designing a new kitchen. Enjoying the fabulous tiles and popular glass backsplash are the main aspect. They look much better if the unity is not broken by plugs, even if they harmonize in color.
Using sunken plugs into the countertop is a common solution. Its lid perfectly slicks to the countertop when not in use, and can be released with a single press, then just close it after using. The space for sinking, should be considered while creating the lower cabinet. It can be purchased with round and rectangular intersection, in several colors and with several number of plugs.
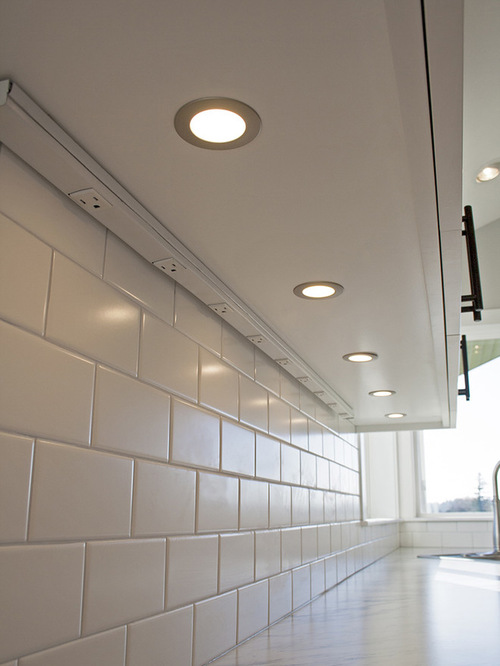
Sockets can be put on the bottom of the upper cabinets also. They will be invisible from the front. These can be even sunk into the cabinet in the case of custom made furniture, this way harmony will be more perfect.
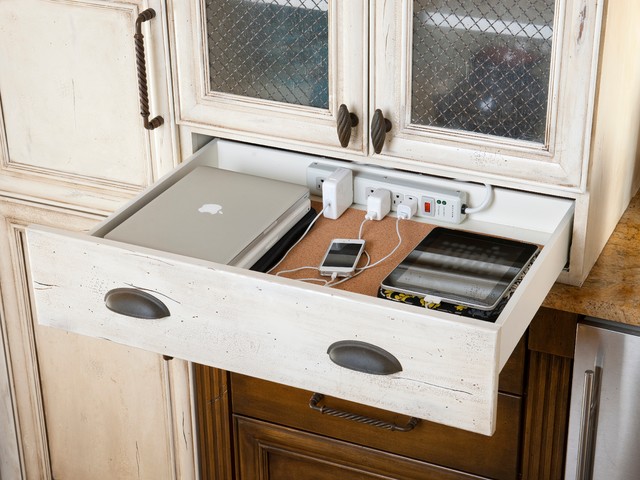
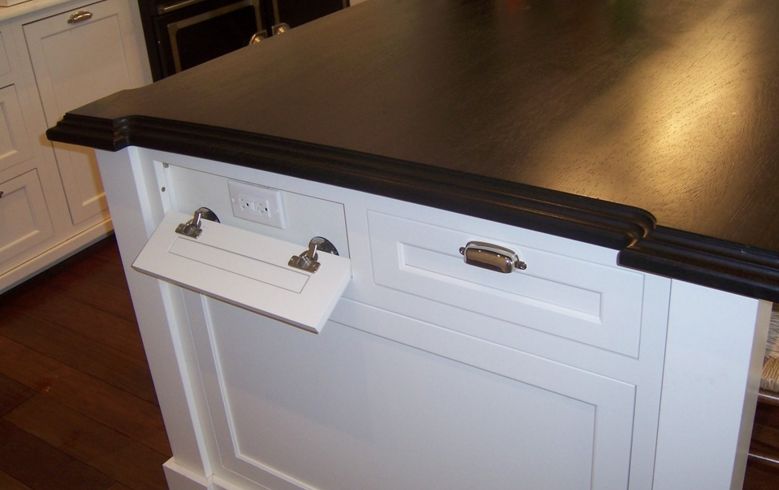
There are much more possibilities in the case of a custom made kitchen cabinet. Plugs can be hidden in a drawer also, just like in many hotel bathrooms. The disadvantage: the drawer remains pulled out while the socket is in use, that can block our moving. More space saving solution is making a faux-drawer front which has to be fold down to reach the built-in sockets in the lower cabinet. The door will be looked as a part of the furniture while out of use. This is a good solution in the case of a kitchen island also.
Although corner socket is visible at the edge of the countertop and the wall, but at least it can be glued to its place without cutting the backsplash. It will partly slick to the sight choosing it in a proper color.
Ask for help of an interior designer for planning your kitchen.